How do I connect a sensor to the DASH2?
step 1: Connect up the sensor to the DASH2. The red wire on the sensor should be connected to the grey wire on the display. The two black wires should be connected to each other. The white wire on the sensor should be connected to the yellow/green wire (analogue 1) or blue wire (analogue 2) or Conn 1 pink wire (analogue 3) or Conn 1 purple wire (analogue 4) on the DASH2.
step 2: Enter the "DASH2 configuration tool" on the computer, and Select "DASH2 Analog 1" from the drop down menu in the upper, left hand corner of the window.
step 3: Further down the configuration tool window, you will find the "Scaling" section. Click on the "Use a standard sensor" button.
step 4: A small window will now appear. Use the drop down menu to select the sensor that you wish to use.
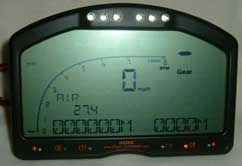
step 5: On the right hand side of the configuration tool, you will find the section that enables you to name the analogue channel (in this case an air temperature sensor was being used, so the channel was re-named "Air"). Below this, is an option to specify the number of decimal places that you want displayed on screen. Fill them in accordingly.
step 6: Now enter the "Setup screens" tab on the configuration tool. Use the drop down menus to ensure that the channel that you are using will be shown on screen.
step 7: When you are happy, click on the "Send Configuration [Serial]" button at the bottom of the configuration tool window.
After a few seconds the new configuration will be transferred to the display and the sensor readings will be clearly visible
.