Step by step guide of designing a simple video overlay
This guide shows you creating a new video overlay from scratch, customise it and use your overlay to export a video with multiple camera views.
- Step 1: Opening the application and selecting the overlay type
- Step 2: Adding video source controls for camera views
- Step 3: Adding a track map
- Step 4: Creating a Speedometer
- Step 5: Saving and loading overlays
- Step 6: Defining groups and assigning controls
- Step 7: Adding editable properties to groups
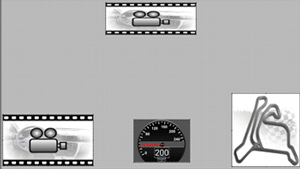
| Example overlay in Design mode
|
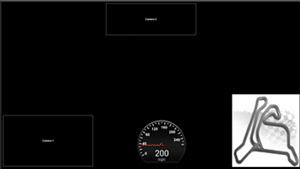
| Example overlay in Preview mode
|
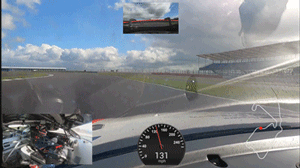
| Snapshot of a video exported with the overlay
|
|
| 
|
| 
|
The overlay you are going to design consists of following controls/gauges:
Note: A gauge is a combination of one or more controls. Some gauges have only one control, such as Video source or track map.
Many gauges require you to combine more than one control. For example, speedometer in this guide has four controls.
- Two Video source controls – for camera views
- Speedometer – Combination of two bitmap controls, one digital display control and a simple text control
- Track map – Re-sizable control with many options to control its appearance and operation
