How to Configure the Built in Serial ECU decoder on DL1
An ECU interface license are required for this option to work.
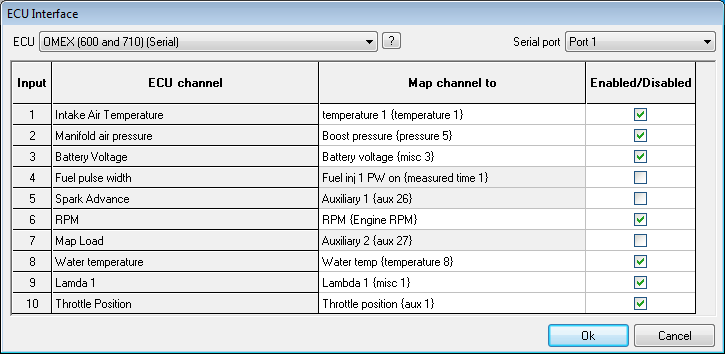
Click on the ECU interface option from the DL1 configuraOnce the ECU interface menu has been opened you will be greeted by the following window:
Using the ‘ECU’ drop down list select the ECU which you require to decode, for the above example the OMEX 600 & 710 ECU has been selected.
Select the serial port to which the ECU will be connected. Where just an ECU is connected to the DL1 Port 1 is recommended so that no breakout cable is required. For applications involving a display connect
the display to Port1 and the ECU to Port 2
Select the channels that you wish to decode and log from the ECU, the information available from ECUs differ between ECU manufacturers
To do this simply click in the Enable/Disable box next to the variable to enable it, a green tick represents a channel which has been enabled.
:
Only select the channels you are interested in. This ensures that only the required data is logged on the DL1, and file sizes are kept to a minimum, this can be useful when logging for long periods of time.
Click OK to be taken back to the configuration software main menu.
Save or send the configuration as required.
Connecting the ECU to the DL1
Please follow the diagrams below for how to connect your unit to your ECU, this should be done in accordance with how the configuration was set up in the previous steps,
If the unit is being used standalone, please follow this diagram:
If the unit is being used with external hardware connected such as one of our DASH displays, please follow this diagram: