Adding user configurable properties to the groups
In the previous section you defined three groups, assigned controls to them and learned how to enable/disable them using the “Group Enabled” property.
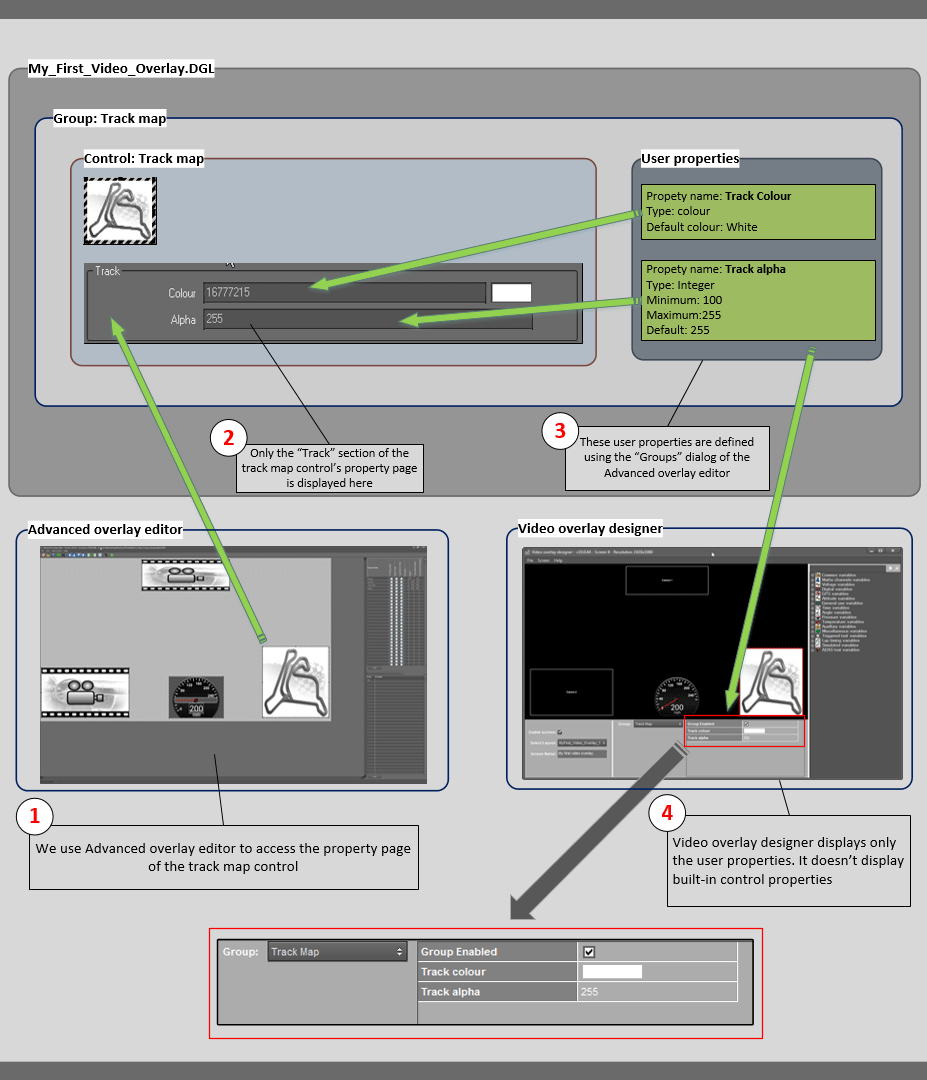
In this section we are going to add two "user properties" to the track map group and they will be used to access two built-in properties of the track map control.
Once these properties are added, they will be visible in the Video overlay designer under “Track map” group:
Following diagram shows how Video overlay designer use user properties to access the built-in properties of control's of an overlay.
Note that overlay customisation tools (Video overlay designer or Virtual dashboard designer) doesn't display any built-in control properties.
Adding user properties
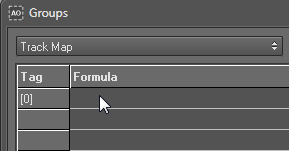
1. Open the "Groups" dialog (View -> Groups). Then select the “Track map” group using the group drop down of the Property definition pane.
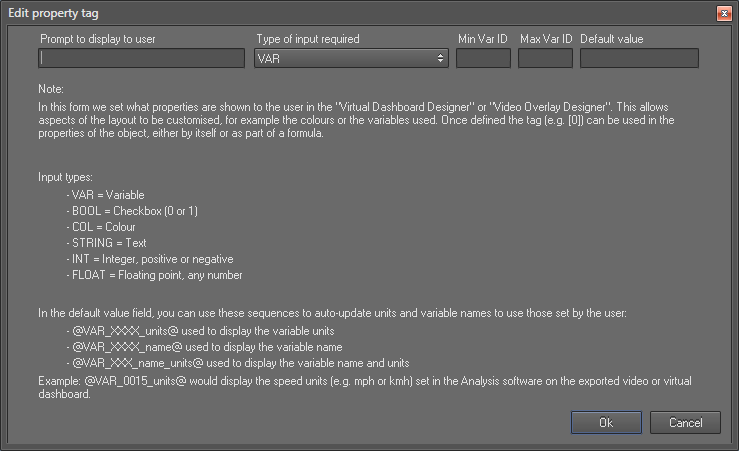
2. Double click on the first row under the "Formula" column to open the “Edit property tag” dialog.
3. Add a new property called “Track colour” and click “Ok”.
- Prompt: Track colour
- Type: COL
- Default: 16777215
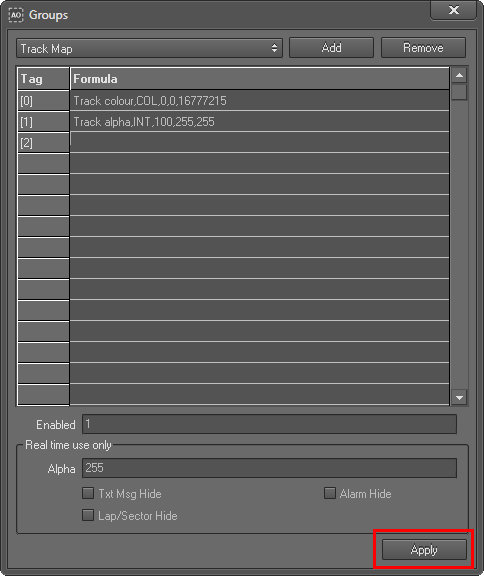
4. Double click on the second row under the "Formula" column to open the “Edit property tag” dialog again and add another property called “Track alpha”:
- Prompt: Track alpha
- Type: INT (integer)
- Minimum: 100
- Maximum: 255
- Default: 255
5. Click Apply button  at the bottom of the property definition panel to add those definitions to the “Track map” group.
Note that each property definition has a tag associated with it. This tag act as an identifier for the property.
6. Now we are going to bind these two user defined properties to two properties we selected from the track map control.
- Open properties dialog of the track map control and change the “Colour” and “Alpha” properties of the track as described below:
- Colour: 16777215#[0]
- Alpha: 255#[1]
7. Open the Video overlay designer again, and switch to the “My first video overlay” screen.
- Change the colour and alpha values of the track map
- “Save and exit” from the application.
8. Export another video using the Analysis video export with the updated overlay and check how the changes are reflected in the exported video.


 at the bottom of the property definition panel to add those definitions to the “Track map” group.


