Configure the DASH2 for use with an external ECU interface
The DASH2 can have a number of different ECU interfaces connected to it through the serial port. These interfaces take either serial data or CAN data from an ECU and convert it in to a format which the DASH2 can understand for displaying on the screen. There is information on which channels are available from the different interfaces here:
This note will demonstrate how to use the DASH2 with one of these interfaces, the channels for which are shown below.
Channel Listing:
| ECU Name
| Race Technology message
| Race Technology Default name
| Race Technology VAR number
| Resolution
|
| RPM
| Engine RPM
| RPM
| VAR_0010
| 1 RPM
|
| MAP
| pressure 5
| Boost pressure
| VAR_3504
| 0.1 kPa
|
| BARO
| pressure 1
| Ambient air pressure
| VAR_3500
| 0.1 kPa
|
| TPS%
| aux 1
| Throttle position
| VAR_2000
| 1%
|
| Coil on-time
| measured time 9
| Coil 1 PW
| VAR_2508
| 1 ms
|
| Coolant temp
| temperature 8
| Water temp
| VAR_1007
| 1 oC
|
| Road speed
| frequency 2
| EGR freq
| VAR_1501
| 0.1 MPH
|
| AFR/Lambda_1
| misc 1
| Lambda 1
| VAR_4000
| 0.1 lambda
|
| AFR/Lambda_2
| misc 2
| Lambda 2
| VAR_4001
| 0.1 lambda
|
| Status flags
| aux 26
| Auxiliary 1
| VAR_2025
| 1
|
| Error flags
| aux 27
| Auxiliary 2
| VAR_2026
| 1
|
| Injector duration
| measured time 1
| Fuel inj 1 PW on
| VAR_2500
| 1 ms
|
| Gear
| aux 28
| Auxiliary 3
| VAR_2027
| 1
|
| Selected map
| aux 29
| Auxiliary 4
| VAR_2028
| 1
|
| Battery
| misc 3
| Battery voltage
| VAR_4002
| 0.01V
|
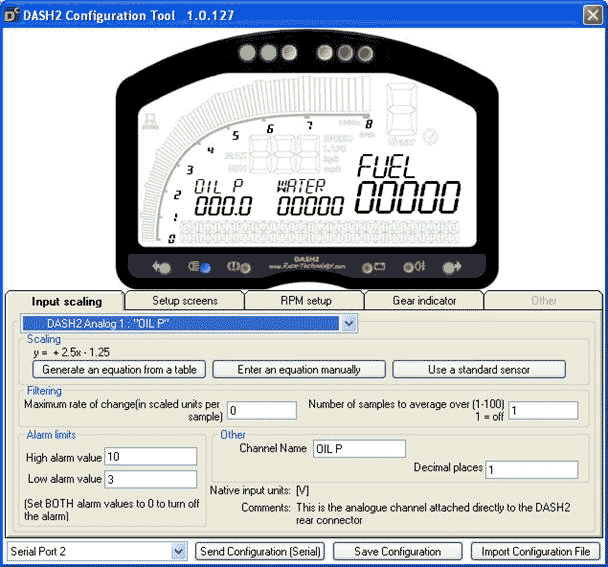
Armed with this information, open up the DASH2 configuration tool.
In the middle of the screen there are 4 active tabs, “Input Scaling”, “Setup Screens”, “RPM Setup” and “Gear Indicator”.
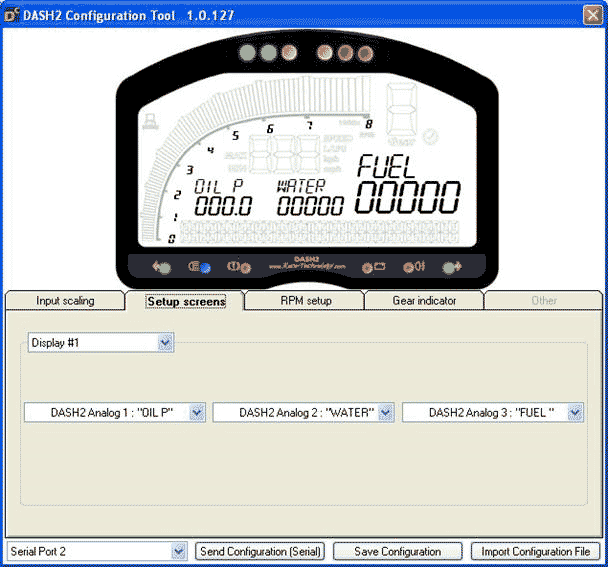
To set the channels that are displayed on screen click on the “Setup Screens” tab;
At default, the display is configured for the built in dash inputs, therefore if an ECU interface is being used, the screen will not update with ECU information.
In the setup screens tab there are 3 drop down menus, these represent the 3 data areas on the screen.
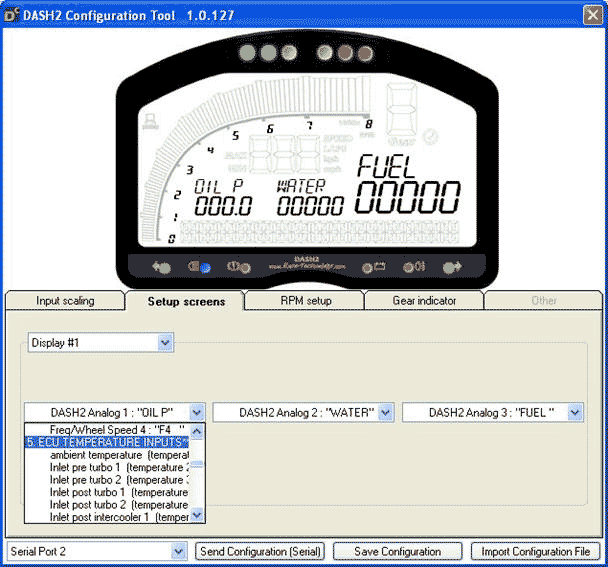
Upon opening these menus there are sub menus that are numbered. When using an ECU interface, all data channels that can be displayed from the ECU are found under the sub menus titled “ECU”. There are 7 sub menus in total that relate to ECU data;
- ECU Temperature inputs
- ECU Frequency Inputs
- ECU Percentage Inputs
- ECU Time Inputs
- ECU Angle Inputs
- ECU Pressure Inputs
- ECU Misc Inputs
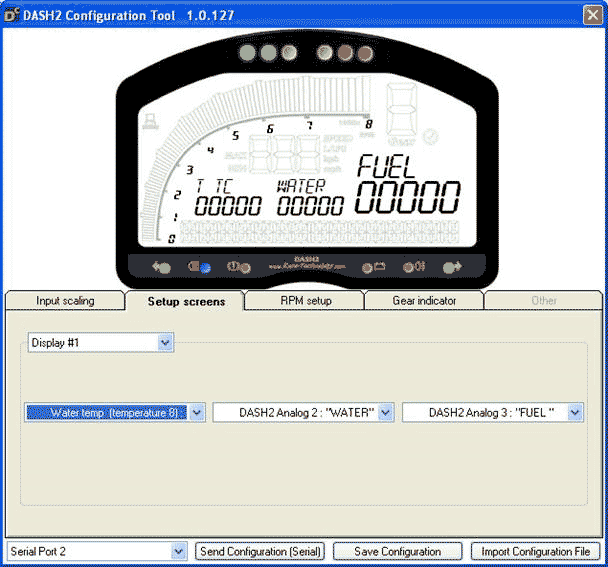
As an example, if Water Temperature was to be display on screen, we should go to the ECU temperature inputs. And select Water Temperature (Temperature 8).
When selected the virtual display at the top of the screen will then display that variable in the relevant data area.
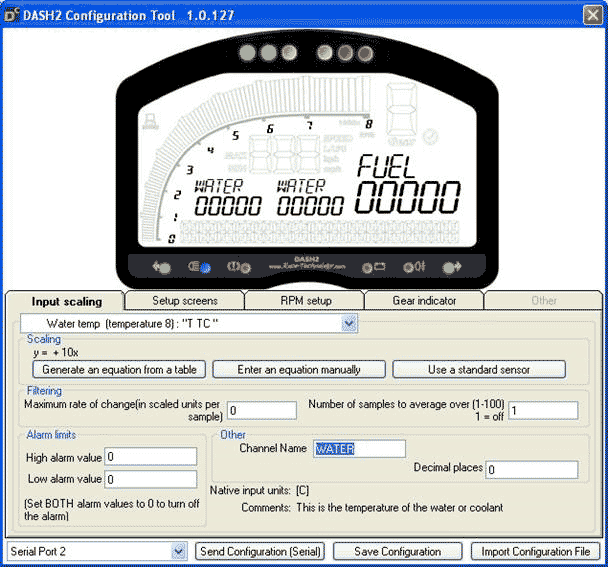
Now this has been assigned the channel naming can be changed to suit the drivers personal preference. We do this by using the “Input Scaling” tab, and selecting the channel from the top drop down list.
In this menu all parameters of the variable can be set, alarm limits can be set to monitor the variable for high and low level, channel name and decimal places can be added for increased resolution. And equations can be added to convert the data into a particular unit of measurement.
Once this has all been completed, save the configuration on the PC in case it is required in the future, and send it to the DASH2 for testing.